 |
| My son Dom enjoying our project. |
FUN & EASY POPSICLE STICK LANTERNS DIY
Hola, Hello!! So I figured we'd begin our crafting/creating journey with an easy & fun project that the kids can participate in. My son and I made some awesome paper lanterns and it was so much fun! My daughters were a little upset that we partook in this cool little project without them, but they were having a daddy-daughters outing so me & Dom didn't feel too bad about it. It was fun, & we can't wait to share this with you. So let's get to it!
***********The list of materials needed are as follows:***********
- Wax paper (I used regular Reynold's wax paper we had in the kitchen.)
 Popsicle sticks You will need 20 Popsicle sticks per lantern that you plan to make. (We chose the thick craft Popsicle sticks versus the thinner type to give us more space to paint & get artistic.)
- Paint or markers (Any paint or markers will do but for best results we chose acrylic paint.)
- Paint brushes (ONLY if you chose to utilize paint versus markers for your designs.)
- Paint palette (ONLY if you chose to utilize paint versus markers for your designs.)

-
- A pencil

- Hot glue gun or tape (I don't know how to live without my glue gun in my life, so naturally of course I chose to use my hot glue gun versus tape. Also, it will make your lantern more durable & secure.) And of course NEVER allow a child to utilize a hot glue gun. No Bueno, very dangerous for burns!
- Plenty of glue sticks- How many? Well, it depends on how liberally you plan to apply your hot glue, but not much is needed to keep these cool lanterns together. (Necessary ONLY if you choose to use a hot glue gun versus tape.)
 |
| Prepare your work space. |
-
Basic shapes, abstract designs, geometric shapes, patterns, intersecting lines, paint splatters, stripes.
- Flowers, hearts, bows, emoticons, rainbows, butterflies, swirly designs, polka-dots.
- Cars, superhero designs, ninjas, scattered numbers, scattered letters, animals.
 |
| I went a bit Dr. Seuss with my popsicles. |
 After you are done creating your masterpiece on the wax paper, leave it to dry and grab your popsicle sticks. Set out your 20 Popsicle sticks flat and separated about an inch apart on your work surface and paint those as well. Only one side of the popsicle stick needs to be painted. The blank side will be on the inside of your lantern which will not be displayed. Allow both the wax paper and popsicle sticks to dry completely. Once they are dry, you can either use tape or use your hot glue gun to bond the sticks together and create 4 of the same size squares as shown in the picture below.
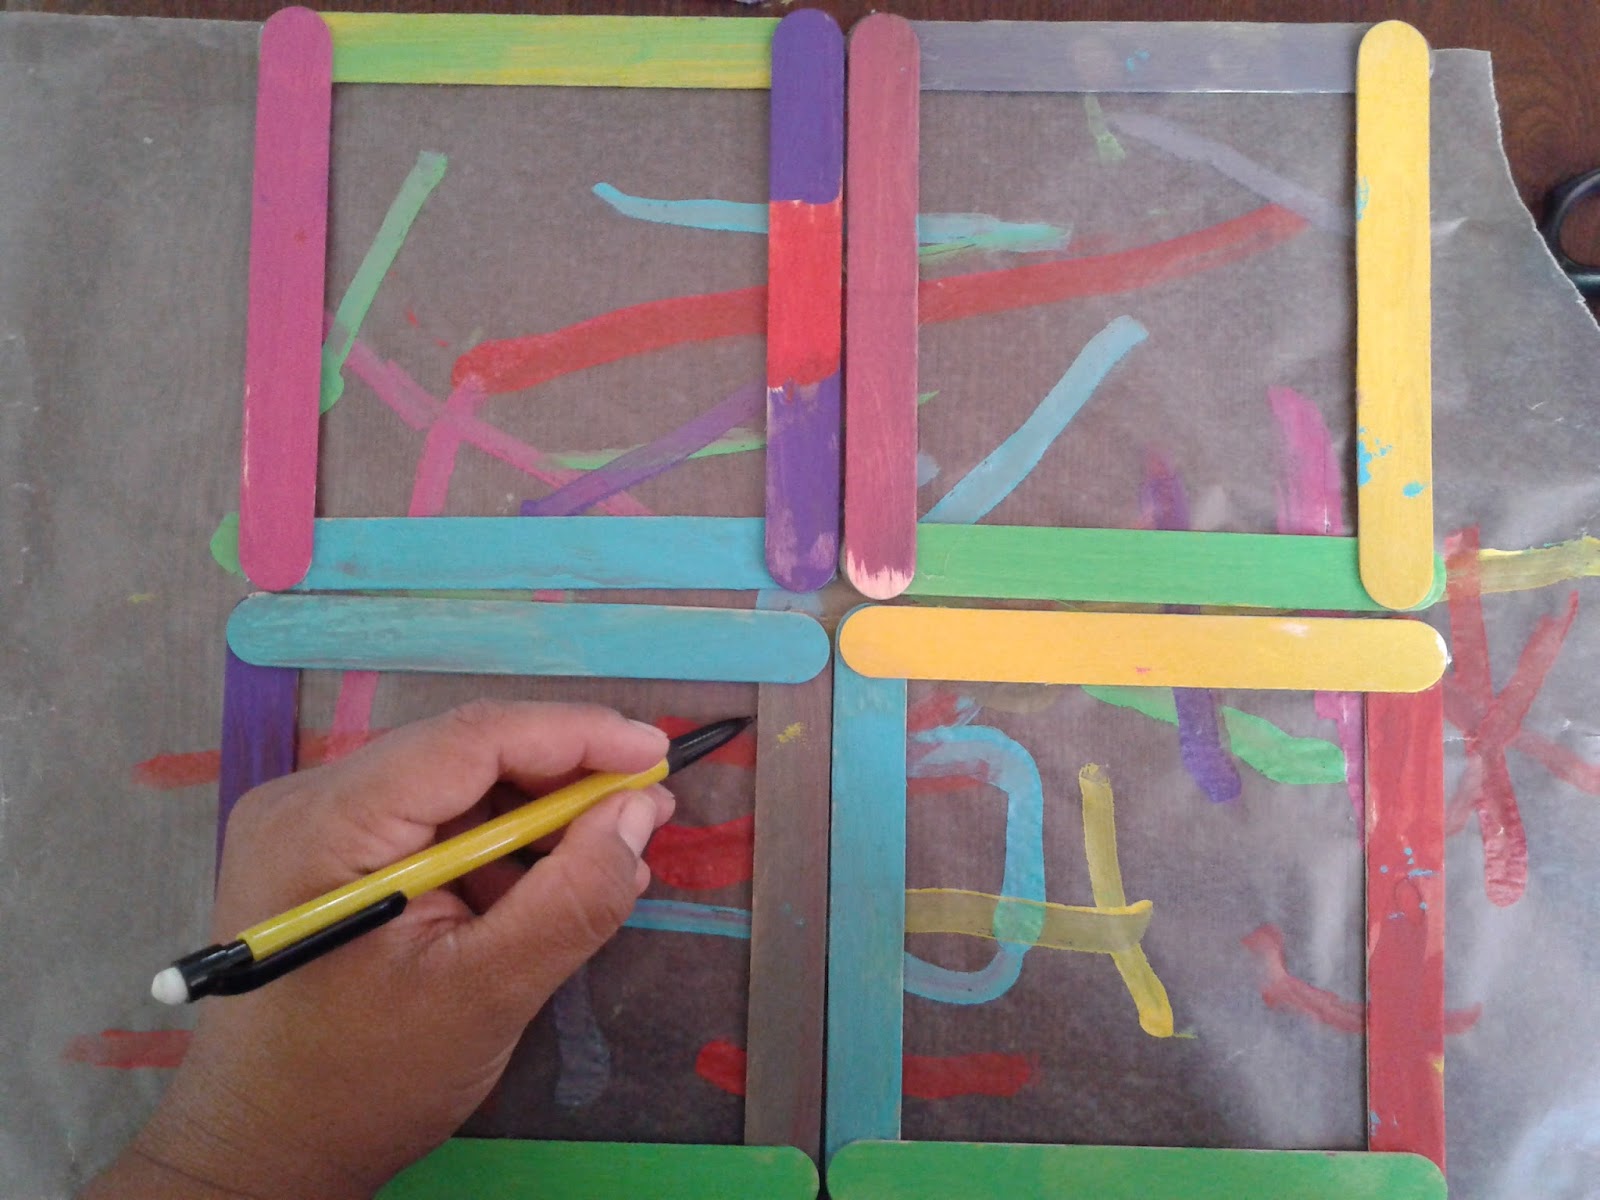
 Next, you will lay your popsicle stick squares on top of your wax paper art so that you may trace the inner part of the square onto the wax paper with your pencil so you get the areas of artwork you'd like to be displayed as the walls of your lantern. Then, cut the wax paper along the lines you traced to create 4 squares as shown. Once you've cut out your squares from the wax paper, use your tracing pencil to erase any lines left so they do not interfere with your art on the wax paper.
Next, you tape or hot glue the wax squares you just cut out onto the back of the popsicle stick squares that are NOT painted. Make sure the wax paper is secured along all 4 corners of the tile and along all 4 sides creating 4 cool art tiles as shown in the picture below.
 |
| Dom's artistic tiles. |

You can now begin creating a cube shape with your popsicle stick tiles that will consist of 4 sides, leaving the top and bottom portion exposed. Utilize the tape or squeeze hot glue onto the interior edges while creating your cube so that the tape or glue is not visible to the outside area of your lantern that is to be displayed. If using a hot glue gun, you must hold the tile edges together until the glue is dry or it will fall apart if the pressure is released too soon. Although hot glue dries relatively quickly, you should still be careful not to burn your fingers.
 |
| My funky art tiles. |
 |
| Top view of the lanterns. |
Lastly, use your last 4 popsicle sticks to create the base for your lantern, this will determine what is the bottom and the top of your lantern and will ensure that your lantern remains in an upright position as displayed in the photo on the left. Allow all the glue to properly dry.Now, you can place either a tea light candle (I like to use a scented tea light candle or votive candle.) or a flame less, battery operated candle which still gives the same glowing effect for your lantern inside the center.
PLEASE NOTE: (I HIGHLY recommend to ONLY use a flame less, battery operated candle for the kids! Kids should never have access to candles due to hot wax burns, or any open flame. Sorry, I know that is common sense, but being a mother I MUST mention it in my post. I want us all to have fun while getting our creative juices flowing, but BE SAFE!)
 |
| Dom did such a great job! He loved it! |
And, VOILA!! You have an awesomely, incredible, artistic, personalized, DIY, wax lantern created with your own 2 fabulous hands, and lots of love!!! :) My son and I had a great time making these lanterns and we're proud of our creation! You should be too! This is a simple craft that can be done by anybody willing to try, and it's fun to do with the kids and really brings out their creativity. So put down your coffee (or wine), grab the kids, even the hubby, and use your hands to create & MAKE this awesome DIY lantern. Happy crafting my fellow mamas!
Until next time,
-- XOXO from Malorie D. aka "Mom Life, Craft Life, Love Life"
 |
| The awesome & easy popsicle stick lantern DIY is complete! |
***Please feel free to comment & share your pictures of your wax lanterns & YOUR family's process enjoying this project! I'd LOVE to see them! Post your lanterns on Instagram. Follow & tag us @lovealumni and #LoveAlumniCrafts
No comments:
Post a Comment